print2mold – get to your injection moulding product faster thanks to 3D printing
Quill Wang | September 17, 2021
Injection moulding tools are usually milled or spark-eroded, require quite some manufacturing time and are therefore expensive. Here, 3D printing opens up new possibilities.
The additive manufacturing of the injection moulding tool generally offers two possibilities.
- Manufacturing a plastic tool using the SLA method – ideal for producing prototypes or very small batches of up to approximately 500 parts.*
- Manufacturing using the SLM method, where the injection moulding tool consists of metal and is used for small batches and test phases for up to 5,000 pieces.*

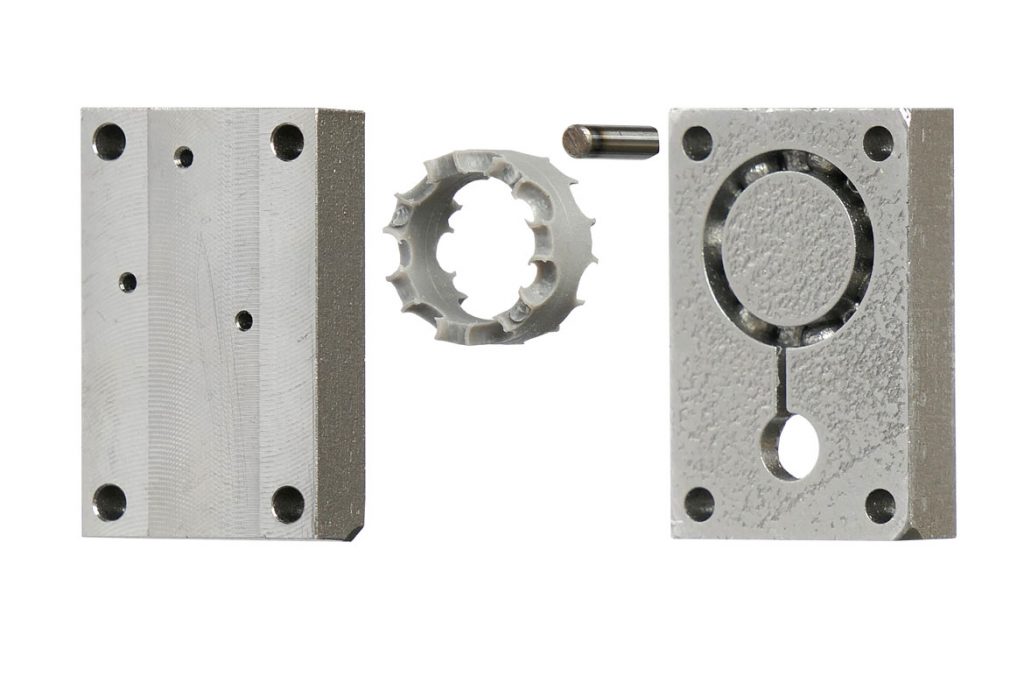
Metal injection mold from the 3D printer for manufacturing an xiros® ball bearing cage
The challenge:
Manufacturing a small batch of a ball cage for one of our xiros® polymer ball bearings from the suitable iglidur® material without having to consider the time required and the high costs for the production of a milled or spark-eroded injection moulding tool.
Metal injection mold from the 3D printer for manufacturing an xiros® ball bearing cage
The igus® solution:
In a first step, we print the injection moulding tool in 3D based on the model of the ball cage. Here, we use the selective laser melting method to produce the necessary quantity for our small series. The tool can be manufactured within 24 hours and is significantly more cost-effective compared to conventional methods. The injection moulding tool produced with 3D printing is then used to produce the ball cage of iglidur® plastic, which has the ideal properties for the later use. The SLM method also allows you to design finest details, leading to a very precise component, which corresponds to our requirements to 100% regarding quality and material. Sounds simple – and it is!

Faster to the injection molding component by 3D printing. Free choice of all iglidur® materials
The realisation:
In contrast to the milled or spark-eroded injection moulding tool, the material is not removed but applied in 3D printing. This means that only as much material is used for the tool as is actually needed. Furthermore, very delicate components can be manufactured in one piece. Milling and spark-eroding only enables this by manufacturing individual parts which are then put together to one tool. To spark-erode the injection moulding tool would be very complicated in this case; by using 3D printing, we are able to produce the small batch of the required component faster and more cost-effectively.
Areas of use are, for example, test phases of series material or components that are meant to be produced of materials that cannot be used in direct 3D printing. This combination of the two methods is also the right choice for quantities for which the production of the complete component in 3D printing is no longer economical.

Gear in the Print to Mold process by using a 3D printed injection mold
Find out more on the subject 3D printing and the manufacturing of plastic or aluminium injection moulding parts on our Homepage.
Here you can also find our Configurator for the iglidur® 3D printing service, to produce your required gears, racks, plain bearings, glide bars online. In addition, we offer you the possibility to simply upload the CAD data of a component, calculate the different iglidur® materials and make an order.
You live and learn, and 3D printing opens up unexpected possibilities to act very fast, cost-effectively and individually depending on the requirement. Regardless of whether you print a small quantity of a component directly in the 3D printer (as long as the plastics you can use here fulfil the requirements of the component) or whether you combine different methods like in our example. The technology of additive manufacturing such as stereolithography, FDM, SLS, SLA or the PolyJet method have significant advantages regarding short-term or individual requirements.
*(depending on the complexity and the material used)
